Flatbed scanner
In order to start scanning, place the given number of disks (from 1 to 6) in the scanner so that all of them are in the scanning area (A4 area). No special peripheral device is necessary for correct scanning. Disks can be located at random.
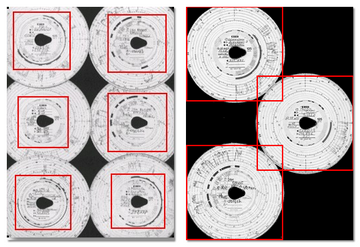
An example disks arrangement on the scanner (Fig. bellow) - the most convenient way as information inserted by the driver will be easy to read from such scanned disks.
Fragments of disks taken into consideration during the analysis are marked with red rectangles. Disks on the scanner must be placed with the recording side towards the bottom. The above example shows disks seen from the scanner glass. Before starting the scanning, you can use the "Default settings". In the settings window you can select the driver, the car, the date of the first disc (each subsequent scanned disc will have a date later by one day). Data entered in this window will be automatically completed for each scanned disc. |
|
After placing disks, close the scanner cover in order to limit possible inaccuracies. To begin scanning of tacho disks, you can take advantage of the following:
•click on the: ![]() icon located in the TachoScan tab in the toolbar;
icon located in the TachoScan tab in the toolbar;
•press the key combination: ![]()
![]()
![]() ;
;
•select Scan option from the TachoScan menu.
If you receive an error message, such as Unable to open default Data Source, make sure that the scanner is properly installed and connected. |
|
In the menu "Basic data -> Settings" there are, among other, settings related to scanner. Indicating the option "Show settings before scanning" causes that every time before scanning begins, its setting will appear.
|
|
||||||||
After scanning, the program will open the last record sheet in the record sheet preview edit tab, and the rest will be displayed in the Unsaved discs panel. Each record sheet should be reviewed, data should be completed and saved.
See also:
Driver card and record sheet data
Record sheet preview/edition window

